Morse Code Transmission
Hi, this blog is a way to keep all my projects in one place, while documenting the process along with all the problems that I encounter.
During the lockdown I tried to pick up as many different skills as possible, one skill I learned was morse code. Morse code is quite simple, it has two characters dashes and dots. Each letter has a specific sequence of dashes and dots associated to it. To make a word in morse, we need to write the equivalent morse pattern for each letter of a word. The first step to learning morse is to memorize the pattern for each letter, there are many ways to do this, I used mnemonics. The part of morse that people don’t realize, is how much it depending on timing and on beats. Essentially what differentiates a dot from a dash and what differentiates a space between two letters and a space between two words. Practicing morse is like practicing the piano with a metronome. Another benefit that practicing decoding morse has is improving your listening skills because you have to listen to a sound and distinguish if it was a dash or a dot, this is much harder than it sounds. Now it is not easy to practice morse as the tools available aren’t that great. I could not find exactly what I wanted to so decided to make my own.
There are many different ways to implement a morse code transmitter and receiver. So, the first thing I needed to decide was what I wanted to make. I would first like to make a simple transmission system with a push button. For now I am not going to be worried with receiving side or the transmission as such as we covered those in a previous project I2C and parity checker. What this project is going to have is a push button connected to an Arduino and a LCD and LED to print what the output is. I’m going to start the project on a simulation because it is easier to test after which I can move it over to my Arduino.
Hardware
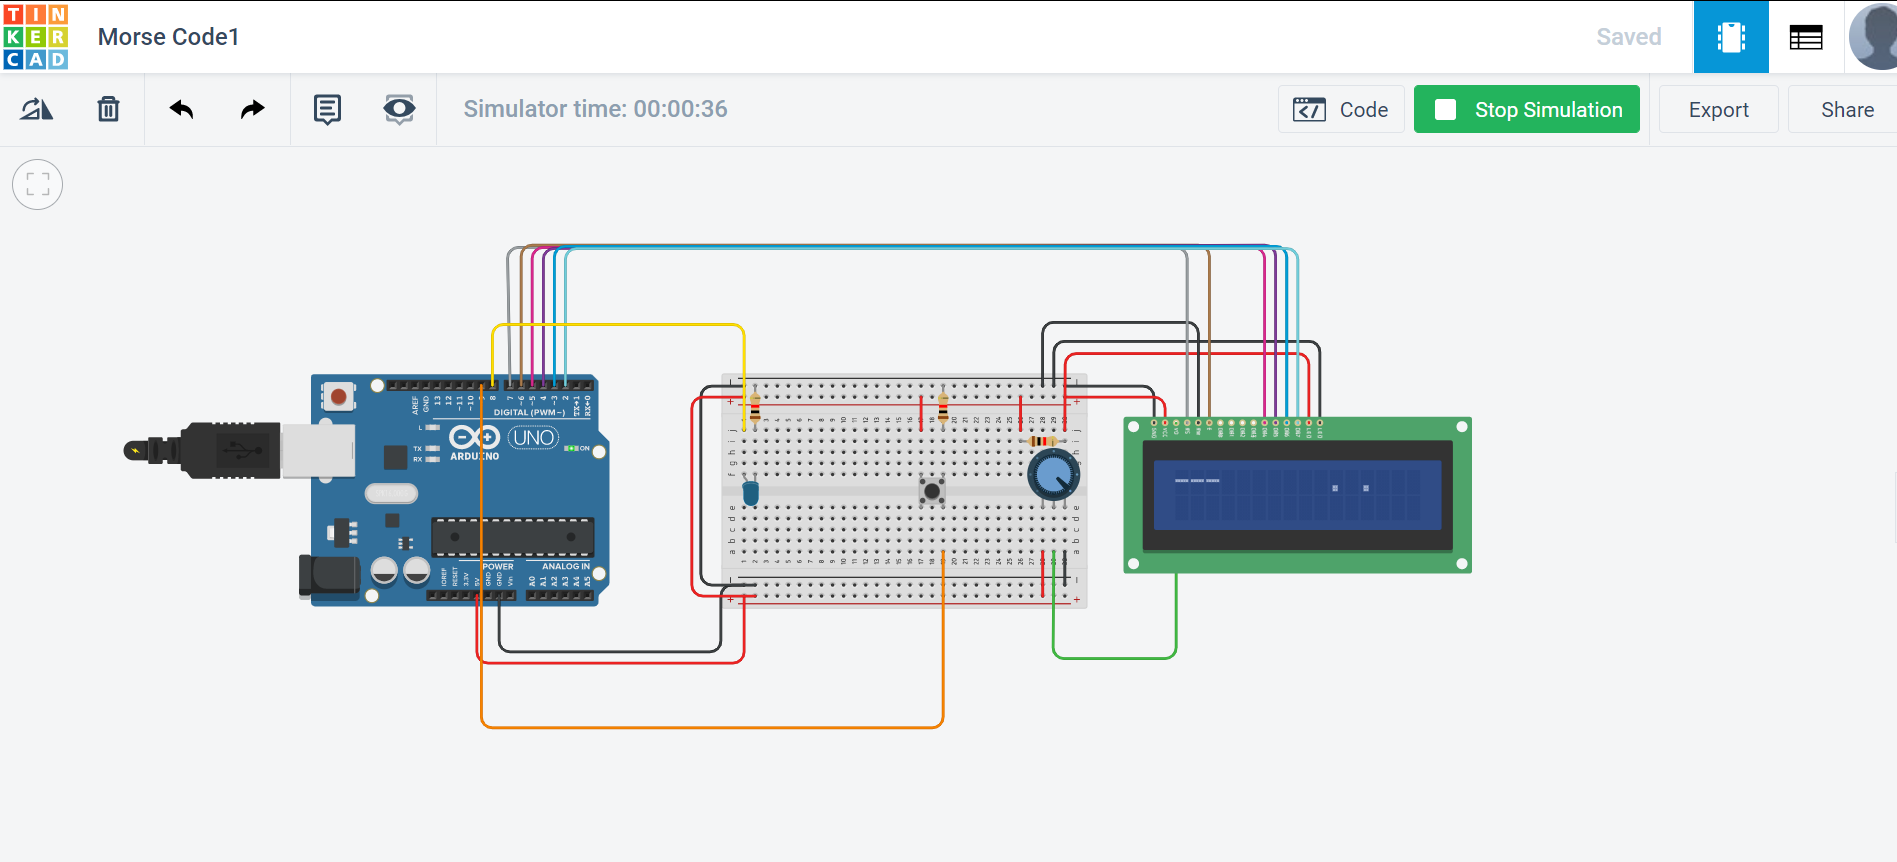
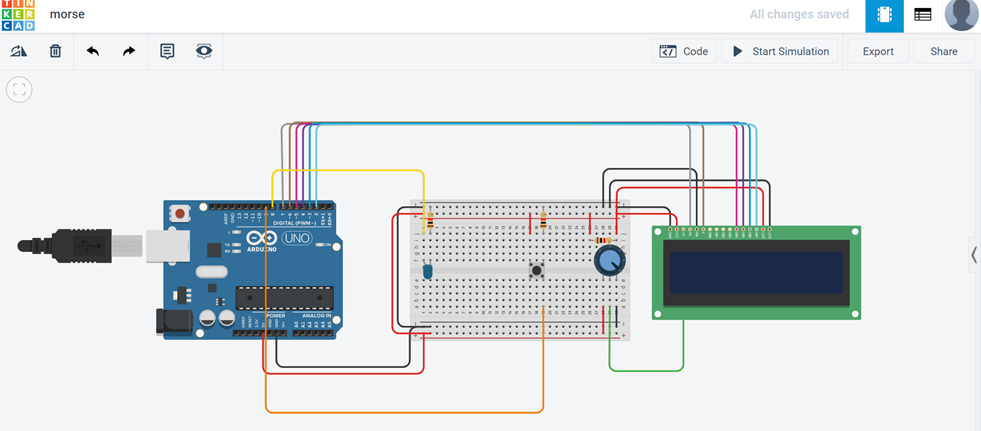
The first thing I am going to need is an Arduino and an LCD, the connections made here are quite elementary. I would also need a pushbutton this should be tied low with a pull-down resistor. If you want to why this is done read about it Here
Code
To start the code, I’m just going to define all my constants and do all the initialization. I need to define a variable call speed, which is going to be the rate of transmission, I’m setting it to 500 but I really don’t know what that would mean, I will probably end up changing that. Another thing I’m going to do is define something called the current state of the button (cstate) and the previous state of the button (pstate), this will help in figuring out if it is a dash or a dot.
Now there 4 possible conditions
1) pstate = 0 & cstate = 1
Here the button was previously off and now it is turned on so what I would do is set the wait variable to one and wait to see if it is a dot or dash
2) pstate = 1 & cstate = 1
Here the button was previously on and it is still on, so this must mean that it is a dash. So, I change the wait variable to 2, as that it is been on for 2 iterations
3) pstate = 1 & cstate =0
Here the button was on previously but is off now so I will look at the wait variable, if it one then it is a dot if it is a two it is a dash. Actally even if its more than 2 its still a dash.
4) pstate=0 & cstate =0
Here we have finished our dash or dot and we should print it and seteverything back to 0 again.
I wrote the following code using the alove principle
#include <LiquidCrystal.h>
#define LED 8 // led is conneted to pin 8
#define BUT 9 // button is connected to pin 9
LiquidCrystal lcd(7,6,5,4,3,2); // initialise the lcd

int speed = 300; // setting the speed of transmission
int cstate = 0; //current state of button
int pstate = 0; // previous state of button
int wait = 0; //distinguish between dahs and dot

void setup(){

      pinMode(LED, OUTPUT);
      pinMode(BUT, INPUT);
     lcd.begin(16,2);
}

void loop(){
  cstate=digitalRead(BUT);

  if ((cstate==1) && (pstate==0)){
    digitalWrite(LED,HIGH);
    wait=1;}

  if ((cstate==1) && (pstate==1)){
    wait=2;}

  if ((cstate==0) && (pstate==1)){
    digitalWrite(LED,LOW);

    if (wait==1){
      lcd.print(".");
      letter=letter+"1";}

    if (wait >=2 ){
      lcd.print("-");
      letter=letter+"2";}
  }

  if ((cstate==0) && (pstate==0)){
    wait=0;}

  pstate=cstate;
  delay(speed);}
Results
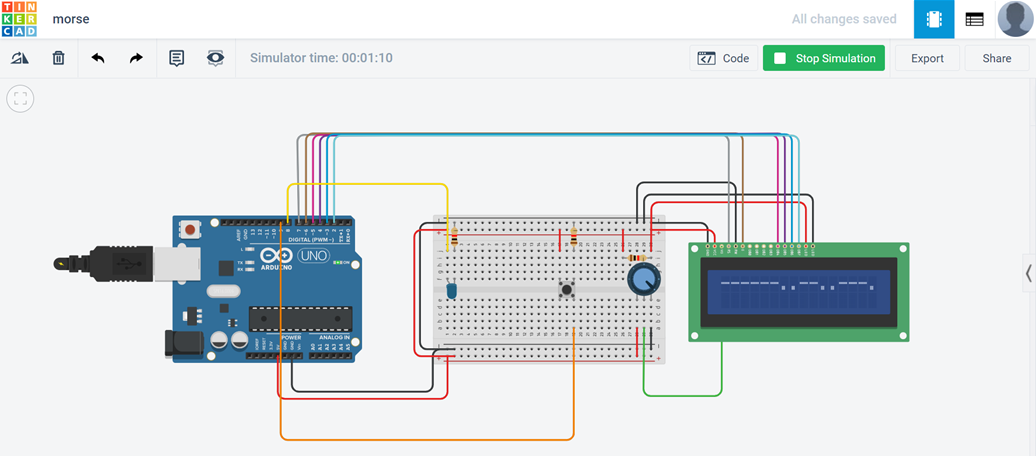
So, my code seems to work but it seems to almost always go for a dash, even after I reduce the speed to 300. I think the problem is in the way I use the delay; I might be better off using an interrupt. Actually, now when I think of it an interrupt makes a lot of sense because I can use rising and falling edge. I can see one potential problem, the bouncing of a switch, which can actually be fixed with a 555 timer, which is another project I have on my to do list which means I can only do the interrupt method after finishing the 555 timer project so I think I’ll work without interrupts for now, and for my next project ill use interrupts. Other things I need to fix is it be able to group the letters and words with space, only if I do that can I work out how to interpret it.
Code
To fix the gap problem I just created a new variable gap, and now I changed the speed to 1000. I also realized I was using just if statements and not if else so I fixed that also.
  #include <LiquidCrystal.h>
  #define LED 8 // led is conneted to pin 8
  #define BUT 9 // button is connected to pin 9
  LiquidCrystal lcd(7,6,5,4,3,2); // initialise the lcd

  int speed = 1000; // setting the speed of transmission
  int cstate = 0; //current state of button
  int pstate = 0; // previous state of button
  int wait = 0; //distinguish between dahs and dot
  int gap = 0;//distinguinsh between a letter and word


  void setup(){

      pinMode(LED, OUTPUT);
      pinMode(BUT, INPUT);
      lcd.begin(16,2);
  }

  void loop(){
    cstate=digitalRead(BUT);

    if ((cstate==1) && (pstate==0)){
      digitalWrite(LED,HIGH);
      wait=1;
      gap = 0;}

    else if ((cstate==1) && (pstate==1)){
      wait=2;
      gap = 0;}

    else if ((cstate==0) && (pstate==1)){
      digitalWrite(LED,LOW);
      gap = 0;

      if (wait==1){
        lcd.print(".");
        letter=letter+"1";}

      else if (wait >=2 ){
        lcd.print("-");
        letter=letter+"2";}
    }

    else if ((cstate==0) && (pstate==0)){
      wait=0;
      if (gap==0){
        gap=1;}
      else if(gap>0){
        gap+=1;}
      }

    if (gap>2){
      lcd.print(" ");}
    pstate=cstate;
    delay(speed);}
Results
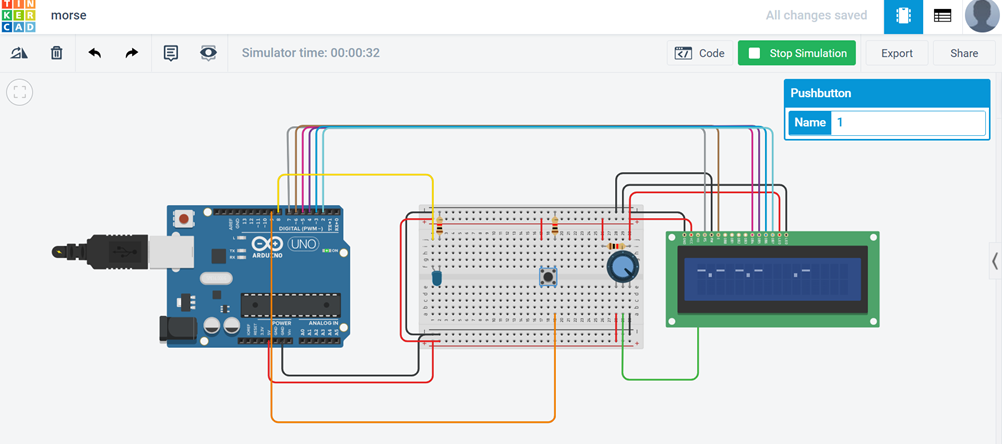
As you can see in the picture I have successfully been able to display" . . ._ " which translates to “KK A”. It seems to work but it is not very reliable, the timing has to be spot on, which actually would be very hard if it was hardware but because it is a simulation, I can see the seconds move on the top, which helps time it. Which does mean that I can’t really do this on hardware very reliably. I could try to time it better and make it more reliable but I think without using interrupts it would only be so reliable. Stay tuned for my next project where I make the receiving side for this system.


